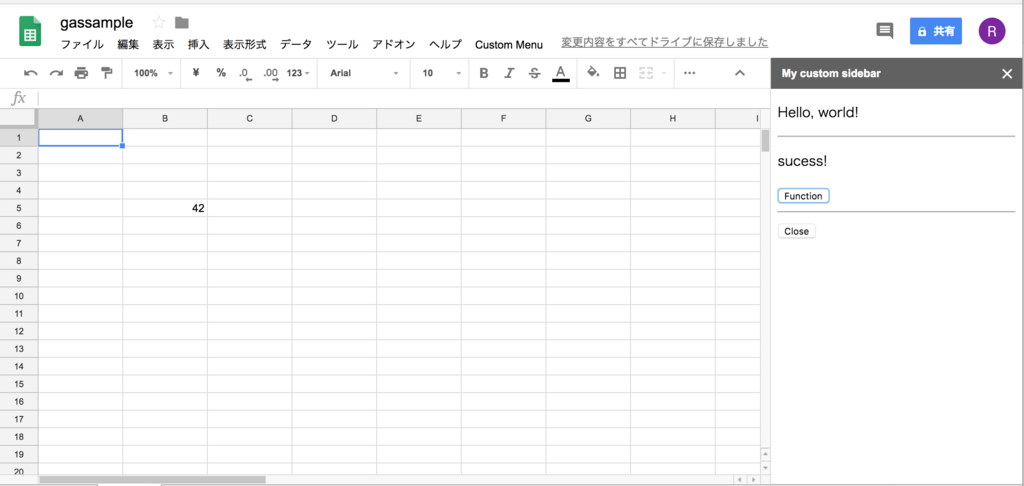
実際のところ
code.gs
こちらは「その3」と変わりません。
セルの値を変更する関数もそのまんま。
function onOpen() {
  //サイドメニュー表示
  SpreadsheetApp.getUi()
      .createMenu('Custom Menu')
      .addItem('Show sidebar', 'showSidebar')
      .addToUi();
}

function changeVal(){
  var ss = SpreadsheetApp.getActiveSpreadsheet();
  var cell = ss.getSheets()[0].getRange('B5');
  var result = cell.setValue("42");
  return result;
}

function showSidebar() {
  //サイドバー
  var html = HtmlService.createHtmlOutputFromFile('page')
      .setTitle('My custom sidebar')
      .setWidth(300); //幅300px
  SpreadsheetApp.getUi()
      .showSidebar(html);
}
page.html
少し違うのはこちら。
お作法に則ってscriptタグを後ろにおいやり、
関数をscriptで呼び出さず、ボタンにつけてます。
一応、onSuccessの下りは無くとも動きますが
後々動作ログまわりで泣く羽目になるだけなので今からつけときましょう。
<!DOCTYPE html>
<html>
  <head>
    <base target="_top">
  </head>
  <body>
    <p>Hello, world!</p>
    <hr/>
    <div id="output">none</div>
    <input type="button" value="Function" onclick="evalGsuiteFunc()" />
    <hr/>
    <input type="button" value="Close" onclick="google.script.host.close()" />
  </body>
  <script>
    function onSuccess(numUnread) {
      var div = document.getElementById('output');
      div.innerHTML = "<p>sucess!</p>";
    }
    function evalGsuiteFunc() {
      return google.script.run.withSuccessHandler(onSuccess).changeVal();
    }
  </script>
</html>
画面
初期状態

ボタンをおしたとき
